How to improve iPhone Photography? Photography and Videography has become more serious and very popular these days. With the arrival of latest models of phones, they have become more practical. Moreover, it is not possible to have a DSLR with you all the time and that too in your pockets.
Recently launched iPhones like iPhone 13 Pro and iPhone 13 Pro Max captures your valuable moments in a DSLR quality. Check out Apple’s newly released iPhone that gives low light photography. Shooting with an iPhone has always been providing results closer to perfection and very satisfying. However, if you want to improve your iPhone shooting and want to capture an eye-catching stills, following tips can be really helpful.
Professional equipment always require special care and transportation, if you put a tiny device like iPhone in your pocket that will do everything.
Lets get started from the basics to know your iPhone capabilities
- Fast access to your Camera – (Capture the right moment)
- Clean your Camera Lens – (Clear and sharp photos)
- Use the volume buttons for shutter release – (No blurry photos)
- Use your Headphones to shoot candid photos – (Get natural shots)
- Get the right Focus manually- (Get your subject in sharp focus)
- Use the Grid – (Rule of Thirds)
- AE/AF lock – (Static focus)
- Use the Burst mode – (Get the right moment)
- High Dynamic Range (HDR) – (Bring in more details)
- Use the Self Timer (for Sharper images)
- Blur the background – (More attention to the subject)
- Use leading lines in the frame
- The Portrait mode – (Take DSLR-like photos)
- Hold the phone steady during low light shots – (Less motion blur)
- Make use of the shutter speed – (Creative shots)
- Do post-processing – (Get the most out of your picture)
- Accessorize – (Get out of the limits of your iphone)
- Photography Apps – (Get your photos to next level)
- Use Natural Frames for Composition – (Draw attention)
- Using backlight creatively – (Think out of the box)
- Keep it simple – (Catch viewer’s attention)
- Adjust the exposure for a perfect shot – (No under-exposed or over-exposed photos)
- Try the filters – (Get something different)
- Shoot From A Low Angle – (Get a different perspective)
- Try using Shadows in your composition – (Bring mystery to your shots)
- Capture reflections – (Awesome pics)
- Experiment using Symmetry – (A head-turner technique)
- The Diagonal Alignment – (Attention-catching depth effect)
1. Fast access to your camera – ( Capture the right moment)
Golden moments don’t wait for you, so be ready to shoot when a great photo opportunity comes. For that make sure your Camera app is fast and easily accessible. You don’t want to unlock your phone and search your camera app while the moment is passing by.
Take out your iPhone and try these camera shortcuts,
a) Tap to wake your iPhone lock screen. Swipe the unlock screen with your finger from right to left to open the Camera App.
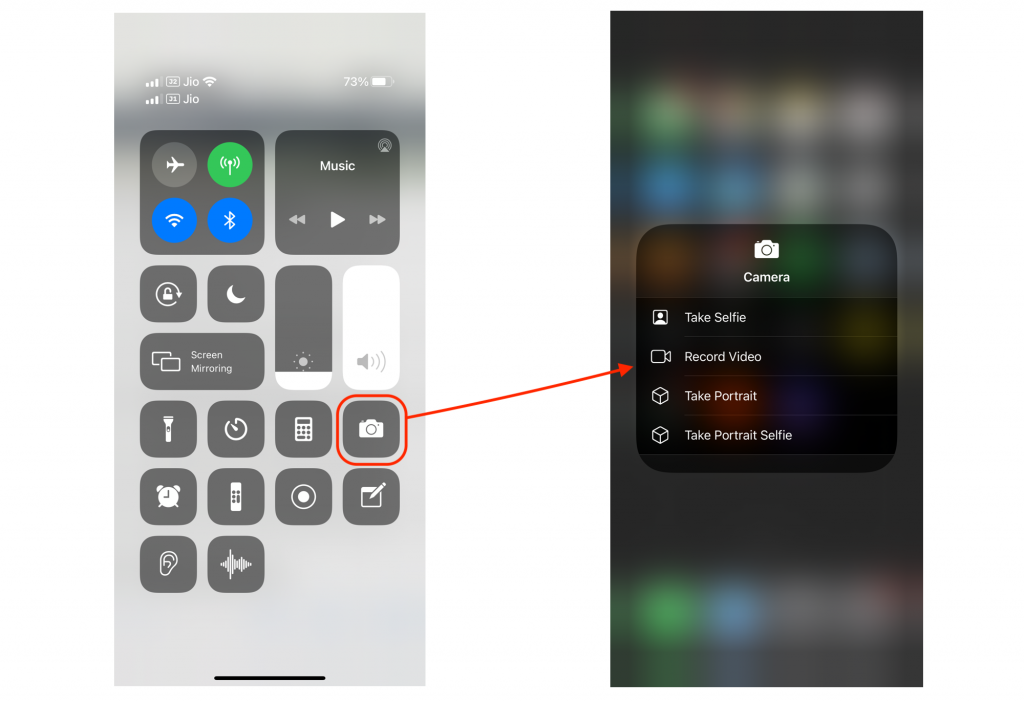
b) The fastest way to launch the Camera App is in Control Center. On iPhone X or later with Face ID, swipe down from the top-right corner of your phone screen. Now tap and hold the camera icon to see camera options and select the required tool.
c) While your iPhone is unlocked use Siri for support. All you have to ask “Hey Siri, open Camera App”.
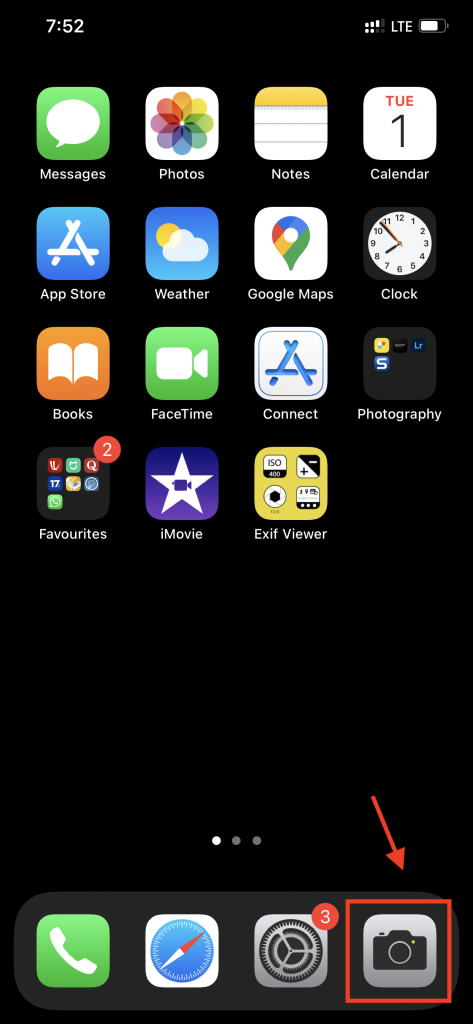
d) Keeping Camera App in the dock is another fastest way to open the app.
2. Clean your Camera Lens – ( Clear and Sharp photos)
Make sure your camera lens is clean every time you take our your iPhone out of your pocket to shoot a picture. It is common to have fingerprints or oily smudges on you iPhone’s camera lens. Clean them using dry microfibre or lens cloth before you shoot or else your image will not be sharp or might be foggy. Most people don’t do this. This small habit alone can give you clear, sharp and crisp images.
3. Use the Volume button for shutter release – (No Blurry photos)
Using the volume buttons to snap the picture is much easier in most situations. Trying to use the shutter button in the screen may result in shaky images. Nobody wants a shaky picture. In the photo capture mode, the best way to shoot is to hold your iPhone firmly using both hands and press the volume keys to snap.
4. Use your Headphones to shoot candid photos – (Get natural shots)
Capturing unprepared, natural moments is always awesome. Using your headphones you can click pictures unnoticed. Ever tried them? It doesn’t have to be secretly photographing someone. You can use this method to click awesome moments of your kids for example.
Earpods (Wired headphone) users : Plug the regular Apple headphone with cord to your iPhone and by pressing the volume control up and down buttons take a shot.
Question: Can i use Apple Airpods / Airpods Pro as a camera shutter ?
Answer: No, Apple Airpods can’t be used as camera remote to take a picture like the Apple Earpods does.
5. Get the right Focus manually – ( Get your subject in sharp Focus)
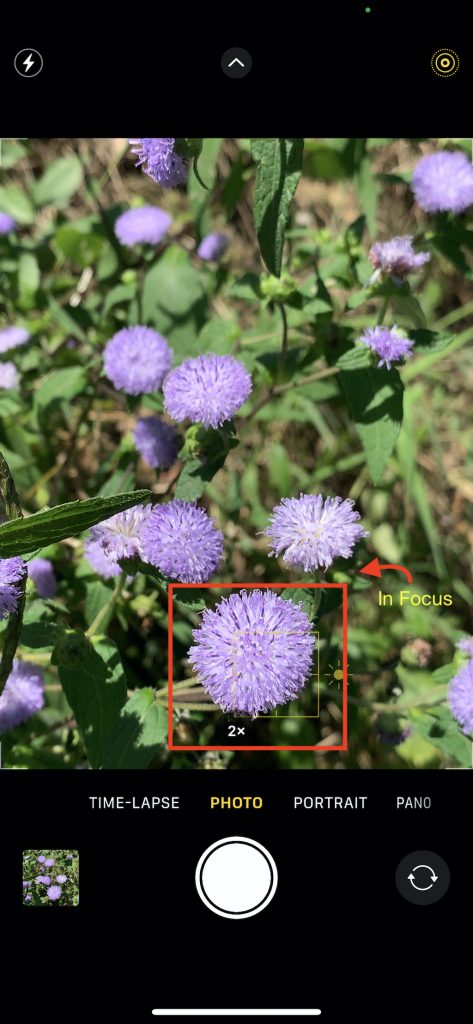
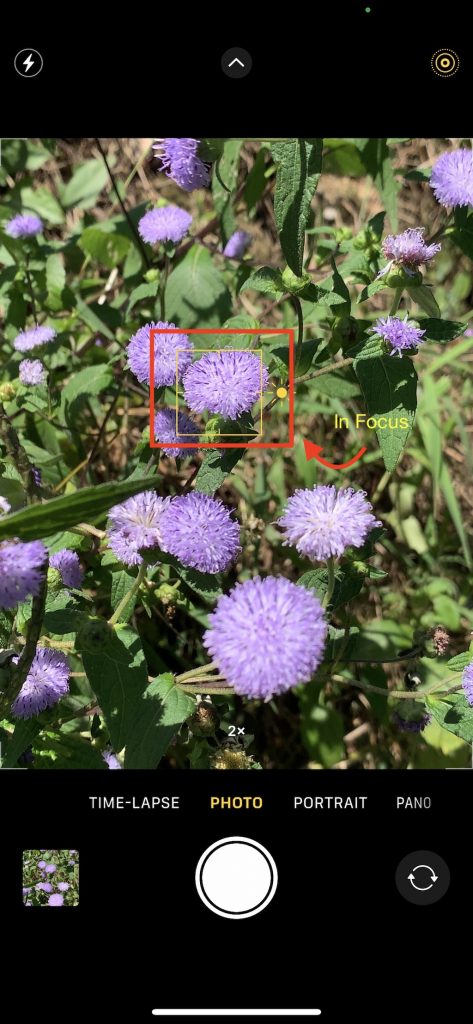
Even if you clean your camera lens, your desired portion of the photo might not be sharp enough. This can happen if the camera has focused elsewhere. Sometimes, your iphone camera might not focus on the desired area. To set the focus manually, touch the area on the screen where you need the focus to be.
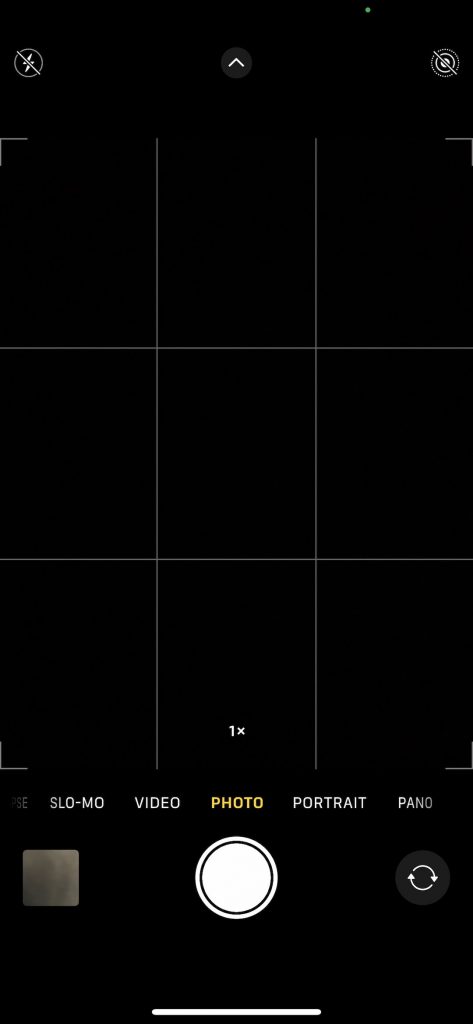
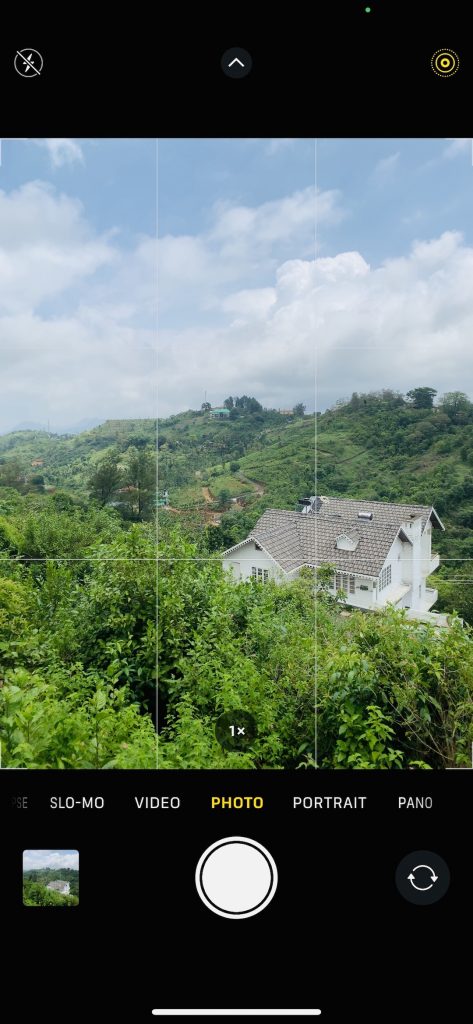
6. Use the Grid – (Rule of Thirds)
Use the grid to compose your frame. It has more uses. You can decide where to place your subject. Using the grid allows you to level or align your frame along an object in the frame like a leading line. While shooting a sunset on a beach, you could align your frame to the level of the water.
How to turn on the Camera Grid line?
a) Open the Settings app from your iPhone home screen.
b) Tap on Camera
c) Find Grid and toggle it on.
That’s it, now open Camera App . Align the subject and adjust the image using the Gridlines, the take the picture.
7. AE/AF Lock (Static Focus)
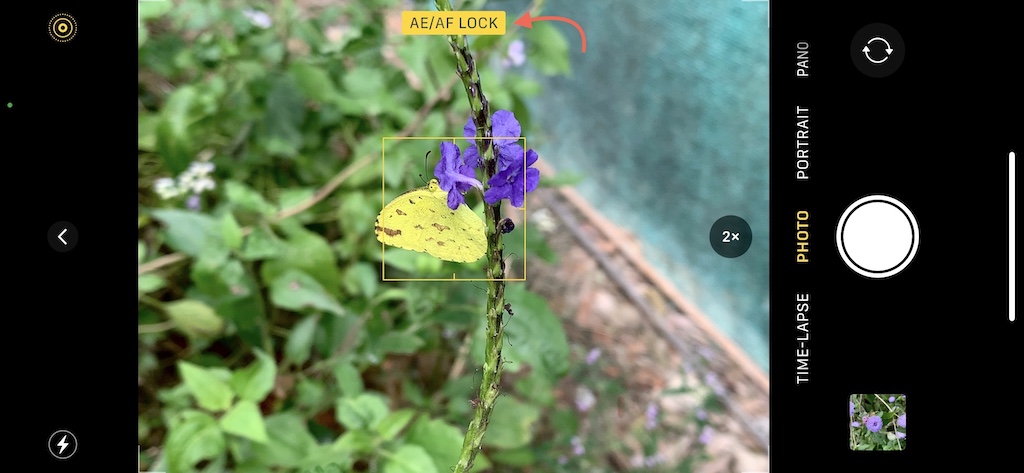
Even if you manually focus an area in the frame, if there is a movement in the frame, your iPhone camera might readjust the focus. To stop this from happening, you can lock your focus and exposure. Touch on the area where you need the focus and hold down for a couple of seconds. You will see a AE/AF lock appear. You can either swipe your finger up/down the screen to adjust exposure, or simple tap the shutter button to take the shot.
9. High Dynamic Range (HDR) – (Bring in more details)
When you shoot subjects with bright backgrounds, if you choose exposure metering on the subject, the highlights (bright areas) may become blown out and lose detail. But if you set your exposure for the background, your subject may become dark and lose almost all the details. Our eye unlike the camera sensor, can perceive a high contrast range in a scene. The camera sensor lacks this ability and therefore we need to use a small technique to bring in all the necessary details (highlights and shadows) in our frame.
HDR combines multiple exposure shots (often called a bracket) to a single frame bringing in the highlight details and the shadows. If you switch on the HDR mode on your iphone camera, it automatically does this for you producing a great shot.
Normally a editing software is needed to combine multiple exposures into a single photo.
How do you use HDR on iPhone?
To turn on iPhone HDR:
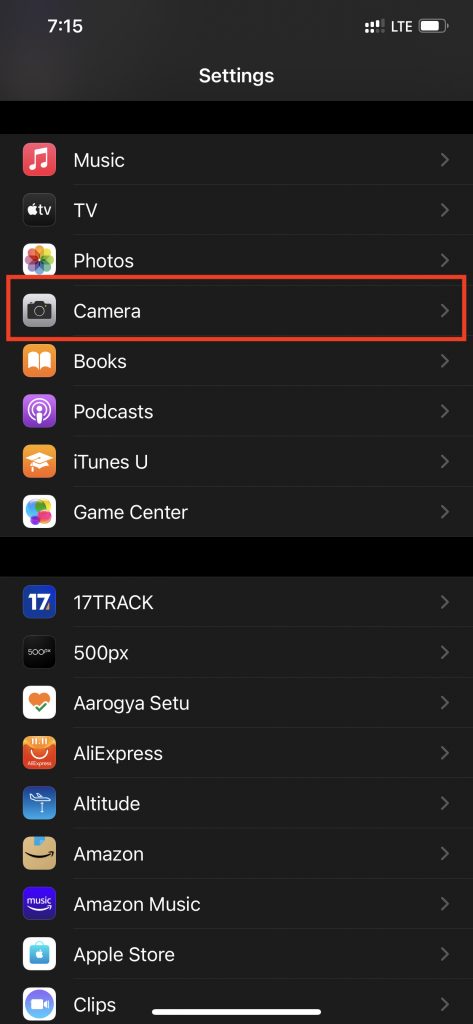
a) Under General Settings tap on Camera
b) Find Smart HDR and toggle it on.
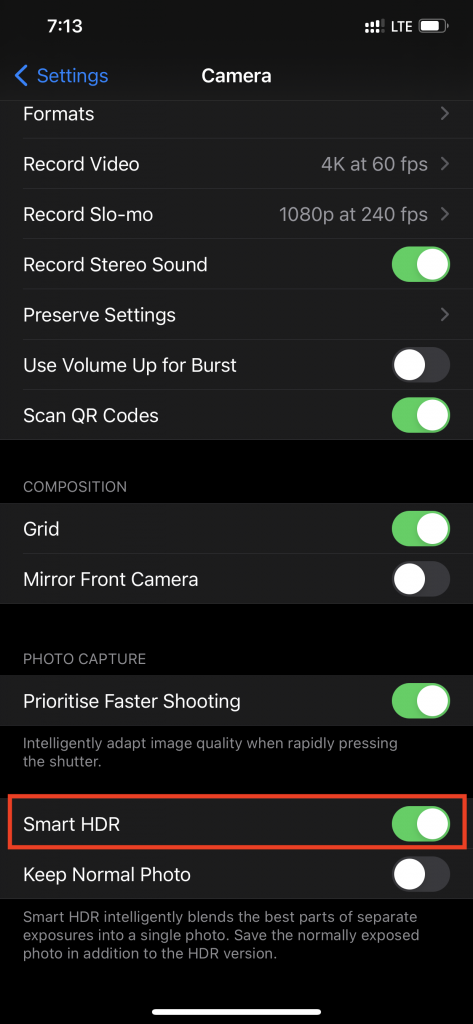
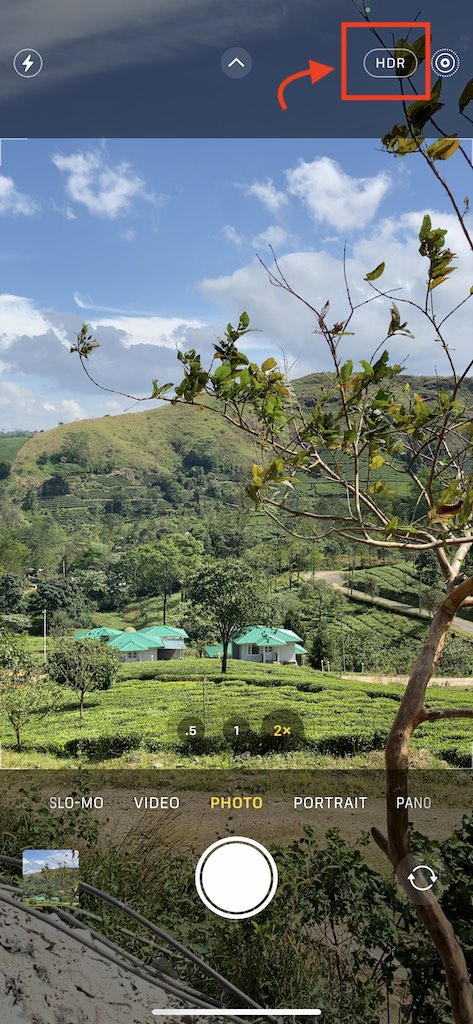
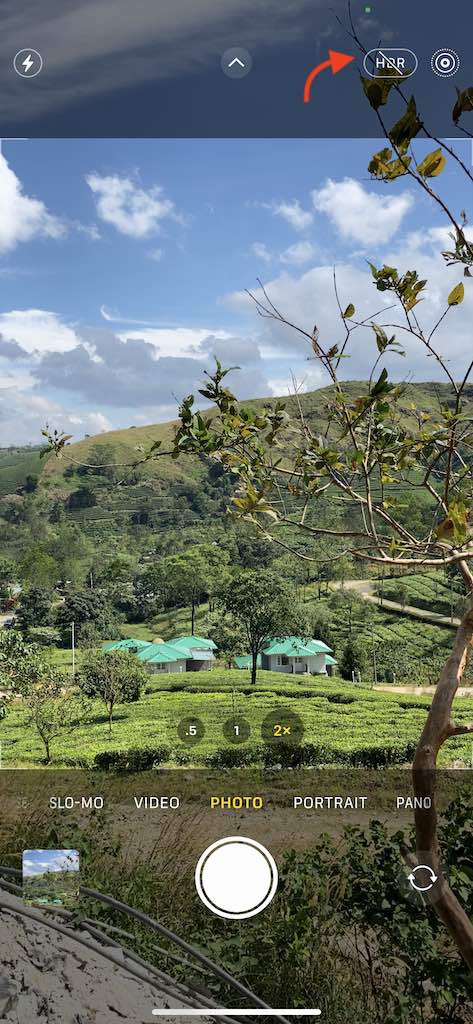
c) Open Camera App. Look for ‘HDR‘ on the top right corner. By tapping on the ‘HDR’ you can control whether or not to use this feature.
8. Use the Burst Mode – (Get the Right Moment)
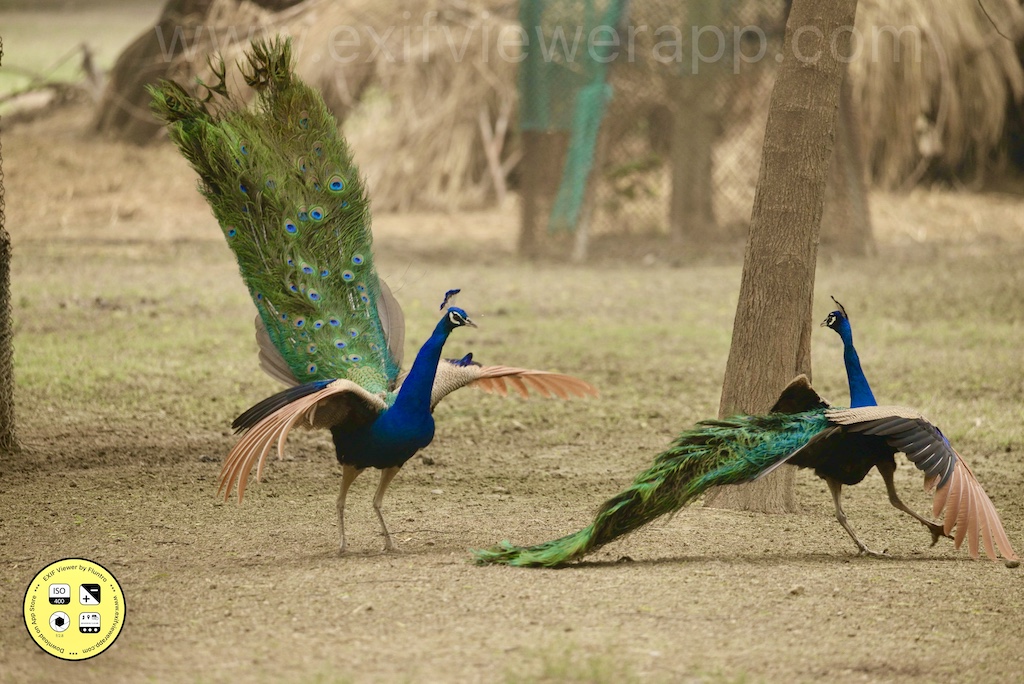
There are situations where you cannot capture the right or desired moment in a single click especially for moving subjects. Burst mode allows you to capture multiple frames at adjacent time intervals so that you can use the perfect moment of the subject. To use the burst mode, touch and hold the shutter button. Now your iPhone camera will take continuous shots until you release your finger.

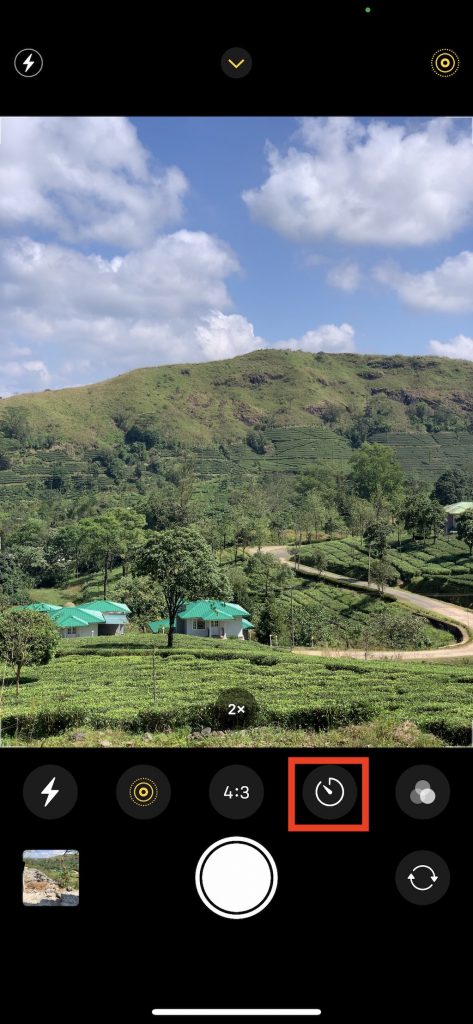
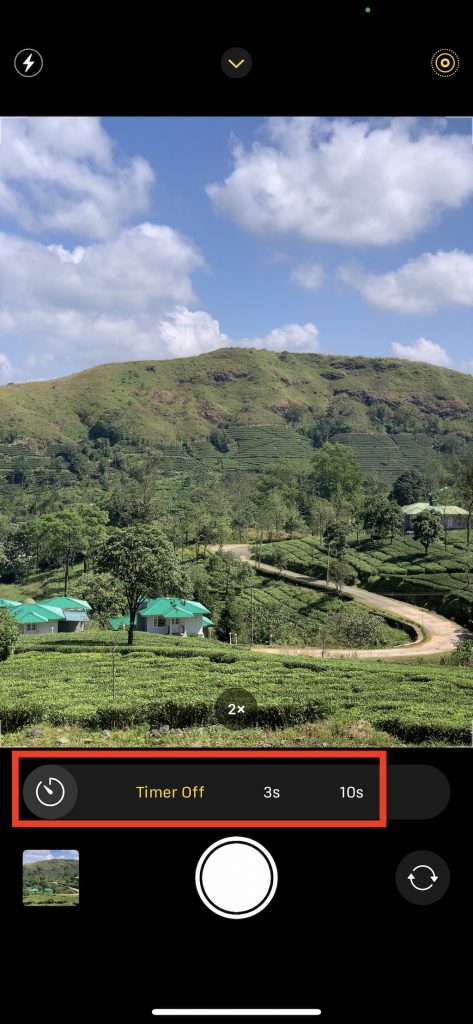
10. Use the Self-Timer – (Sharper images)
Many of us use the self timer just to take group selfies with our friends or family. We set the timer, keep the phone in position and run to join our group. Have you tried taking your normal photos using the self timer? Using the self timer we can reduce the shake during the capture (Either you use the screen button or the volume keys). Set your iPhone somewhere stable or on a tripod and set the timer to the desired seconds and shoot.
11. Blur the background using Portrait mode – (More attention to the subject)
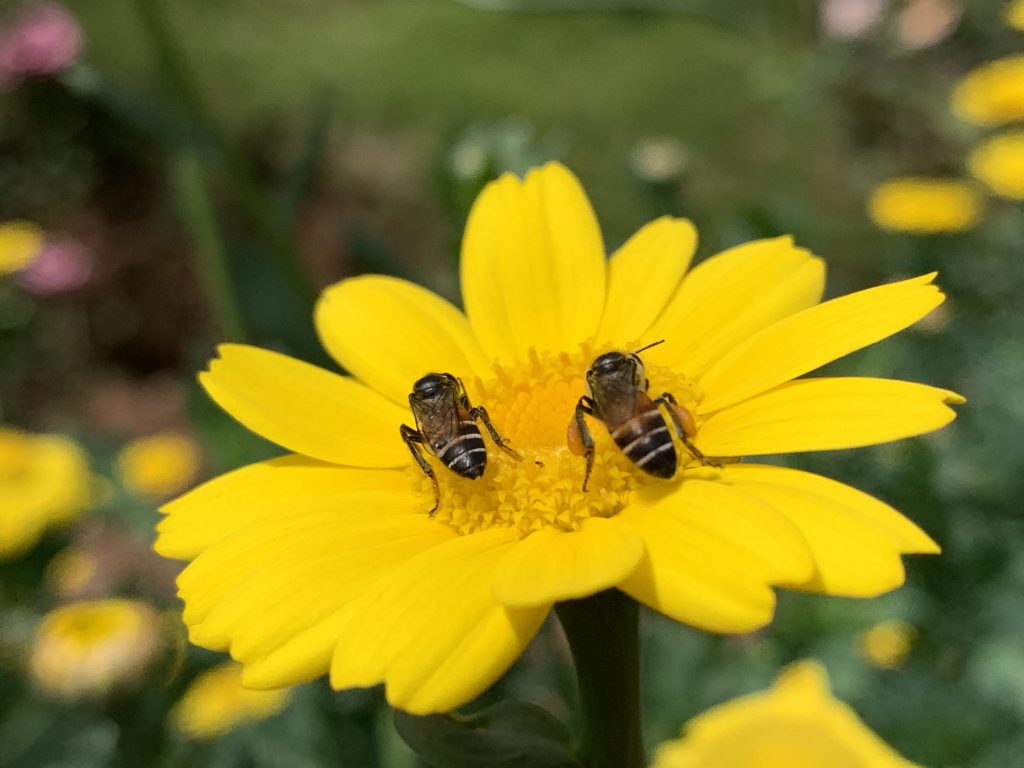
Blurring the background gives more highlight to your subject and also a special effect to your photo. You can get this effect by using the portrait mode on your iPhone camera. You can also get closer to your subject and focus on the subject to get a blurry background. The more you get closer, the more blurry becomes the background. Make sure your subject is sharply focused when you get closer to it. You can use the same technique to blur the foreground as well.


12. The Portrait mode – (Take DSLR-like photos)
Latest model iPhones like the X series, 7 Plus or 8 Plus or higher models allow you to take photos in ‘Portrait’ Mode to blur the background of your photos. You might have seen portraits taken using DSLRs using expensive lenses with blurred background. Such an effect can easily achieved using your iphone also and that too using your stock camera app. Open the camera and choose portrait mode at the bottom of the screen. When the camera has focused on the subject and blurred the background, you’ll see ‘Natural Light’ or ‘Depth Effect’ appear on the screen. Click now to take a stunning portrait shot.

13. Use leading lines in the frame
While taking a photo, look for leading lines that lead to the subject. It is a simple technique to draw the viewer’s eye to your subject. One or two examples will explain it.


14. Hold the phone steady during low light shots – (Less motion blur)
During low light shots, the shutter speed is less which means the sensor will be exposed for more time. So even the slightest movement of the phone or the subject can cause motion blur in the image. You could rest your elbow on a firm support or crouch down to get your shot or get a tripod stand. Self-timer would come handy.
15. Make use of the shutter speed – (Creative shots)
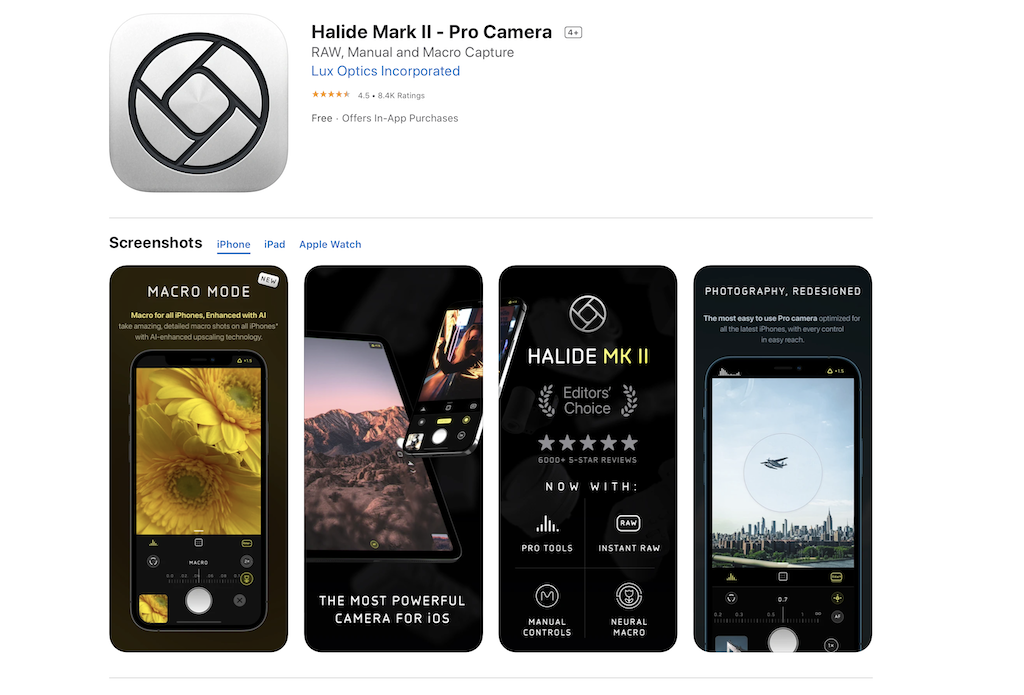
You might not be able to make use of the shutter speed using the iphone’s stock camera app. You can always go for third party camera apps (Halide Mark II – Pro Camera). Controlling the shutter speed allows you to get creative shots, especially of a moving subjects. Increasing the shutter speed allows you to freeze action while decreasing the shutter speed while capturing flowing water can get you a flowing effect or can get you a trail effect of cars in traffic at night.


16. Do post-processing – (Get the most out of your picture)
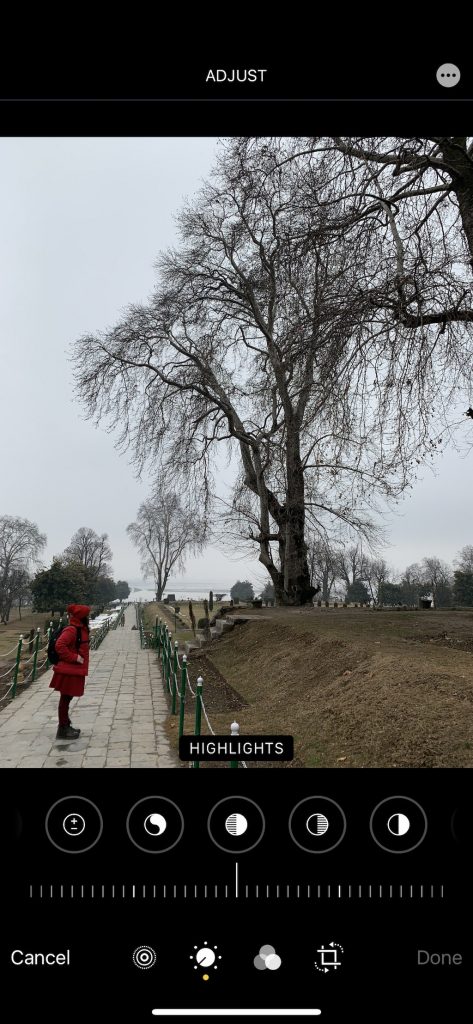
Well, post processing is something you can try to get the most out of your shot. You could correct the elements that you were not able to achieve while you clicked your shot. You can adjust exposure, contrast, saturation, highlights, shadows, white balance, sharpness, apply filters. In latest iPhones, you can even adjust where the focusing point is. There are lot of softwares (Snapseed, Afterlight II, VSCO) available in the Appstore which you can download and use to post process your image.
17. Accessorize – (Get out of the limits of your iphone)
You can always try accessories for your iphone if you are serious in shooting with your iphone. Following accessories may come handy.
- A portable power bank – If you intend to use your iphone camera a lot outdoor, a portable charger might come handy. Like Xiaomi power bank
- An iphone tripod – To achieve steady, sharp shots, a tripod is advisable. You can use the slow shutter speeds to capture stunning low light shots.
- An extra flash light – When the light falls, using an external source of light pointing to the subject at a different angle from other than that of the phone can produce some nice results.
- Clip on lenses – Extra lenses over your iphone camera can get you out of its limits. Macro lenses, telephoto and wide angle lenses are available. There are many cheap brands available but if you care a little more about quality also, then check out lenses from Moment (just a suggestion)
- Backup device – While experimenting with your iphone camera, you would be taking a lot of shots which can eat up your phone memory pretty fast. Check out the SanDisk iXpand Base – a smart gadget that charges your iphone during which it automatically backups your files.
- A good case – Don’t take this lightly. The more you experiment with your iphone, more are the chances of dropping it. So don’t hesitate to invest in buying a good shock proof case for your iphone.
18. Photography Apps ( Get your photos to next level)
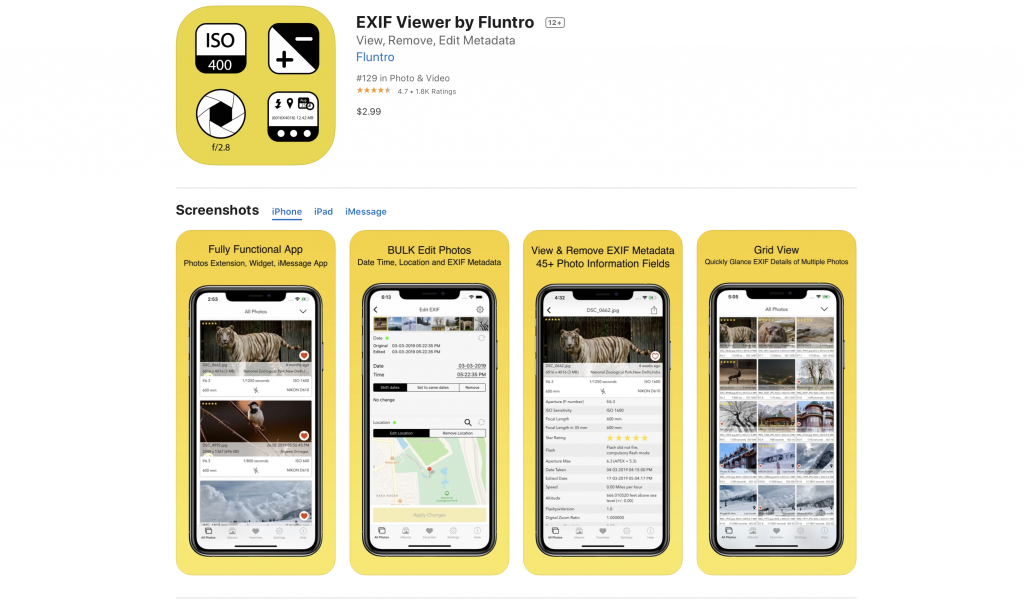
- EXIF Viewer by Fluntro – This Photography App allows you to view EXIF Metadata like ISO, Shutter Speed, Aperture, GPS location coordinates, Altitude and much more. https://apps.apple.com/us/app/exif-viewer-by-fluntro/id944118456

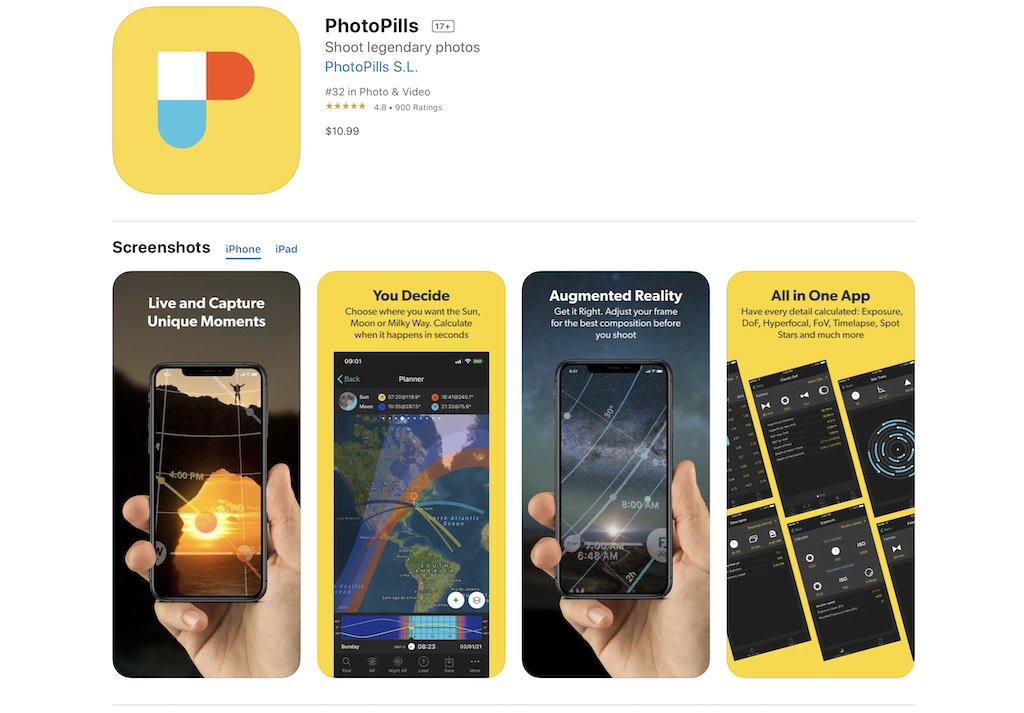
- Photo Pills – App shows combining sun and moon position prediction, location shoot planning. So that you can decide in advance, a perfect time to take a photo at right place. https://apps.apple.com/us/app/photopills/id596026805
- Halide is one of the most powerful camera for your iPhone and iPad. App costs 49.99 USD for one time purchase or 11.99 USD for annual subscription. https://apps.apple.com/us/app/halide/id885697368
19. Use Natural Frames for Composition – (Draw attention)
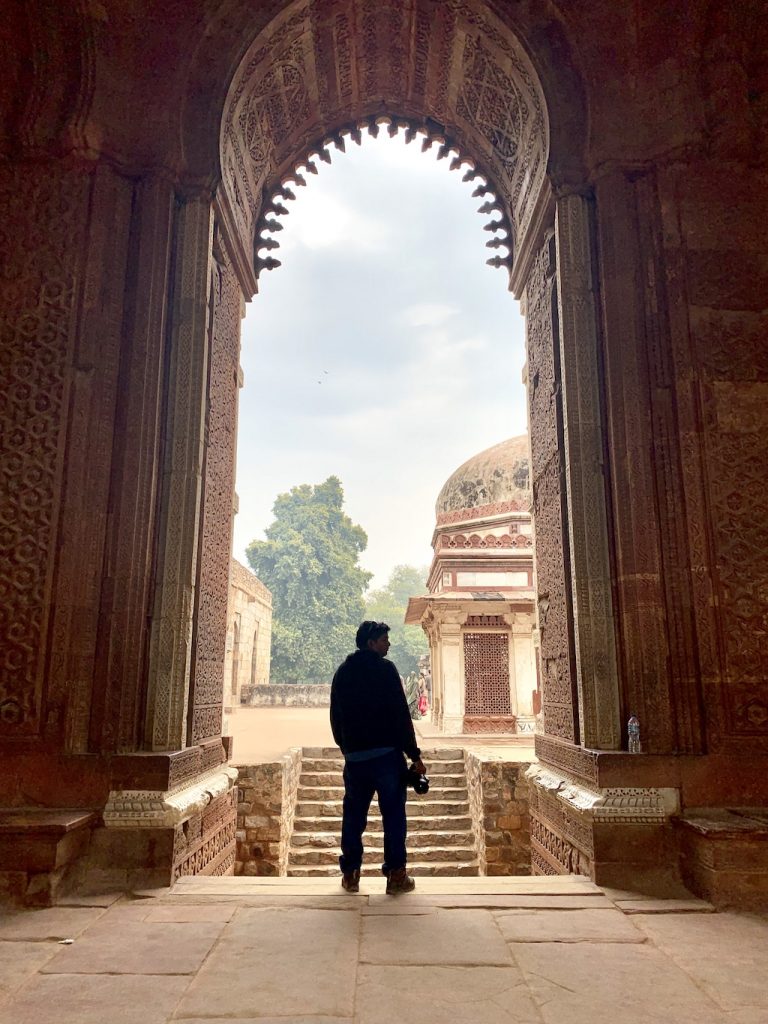
Using natural borders around your as frames can draw attention to your image and your subject. Always look around to find something interesting.

20. Using backlight creatively – (Think out of the box)
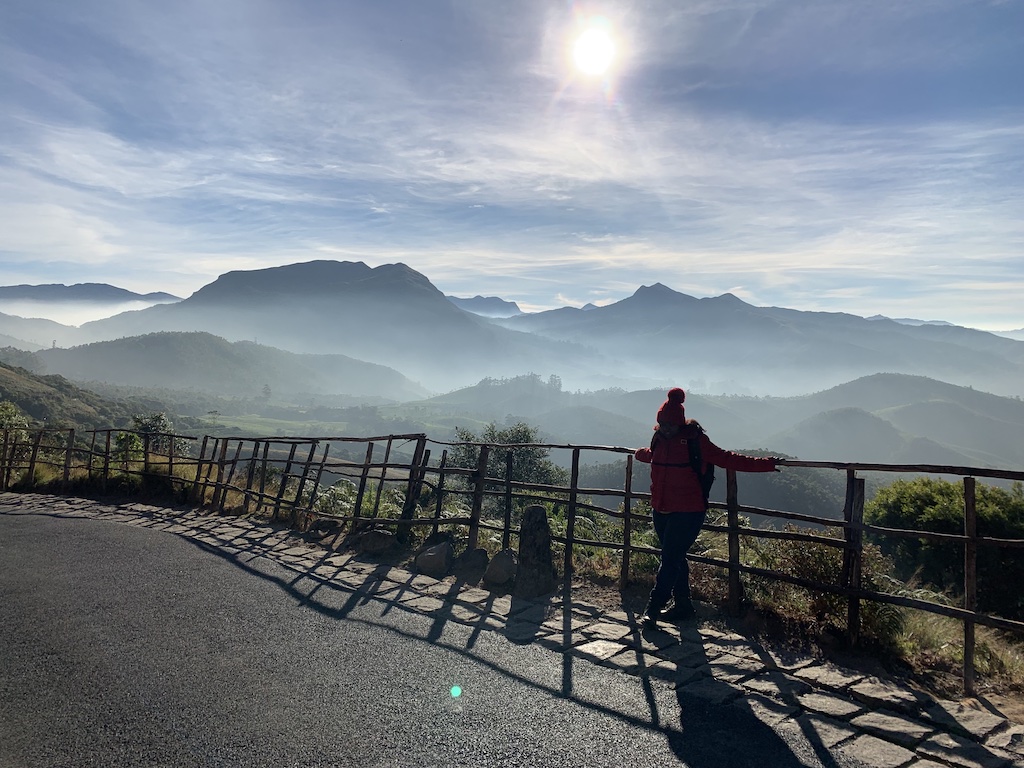
You might have heard never to hold the camera against a light source. Have you ever tried to do so? Well, rules are meant to be broken. You might need to think out of the box to get something different and creative. Use the backlight to create a silhouette or to add lens flares to your image.



21. Keep it simple – (Catch viewer’s attention)
Try to make your frame simple. Having lot of elements in your frame takes away the attention from the subject and distracts the viewer. Remember, simple is powerful.


22. Adjust the exposure for a perfect shot – (No under-exposed or over-exposed photos)
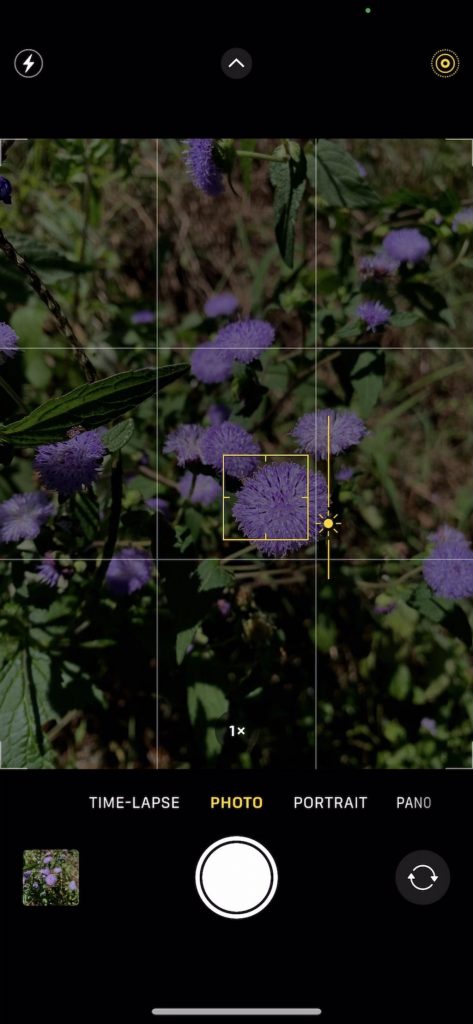
Sometimes when your click a photo, the exposure value may not be what you wanted it to be. This might ruin your idea of the photo. So to manually set the exposure, open the camera app on your iphone and point to your subject and click in the frame to autofocus and set exposure. Now you will see a “yellow sun” icon near your focused yellow square. Click on it and drag up or down to adjust the exposure.
23. Try the filters – (Get something different)
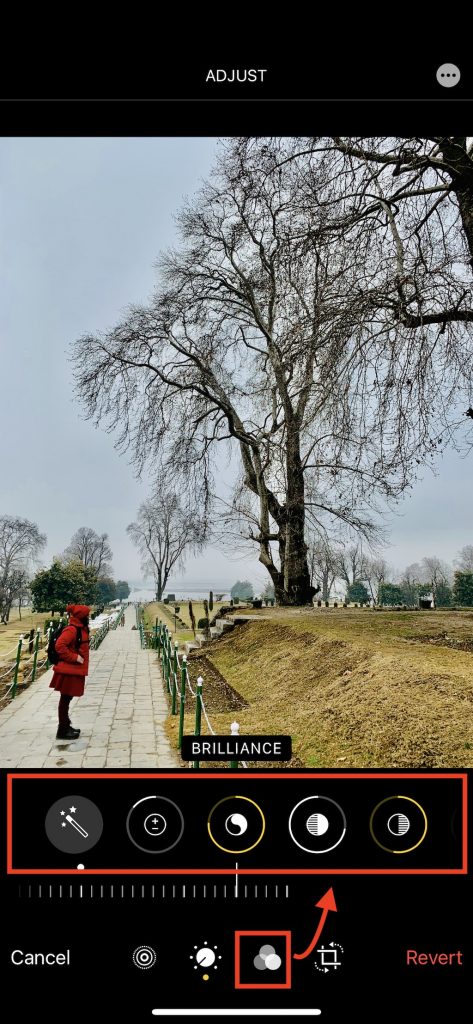
You might have tried the filters available in your iphone camera right ? if not, you can access them by tapping on the three overlapping circles icon in the top right corner in the Camera app. Choose among the filters carefully to get the perfect photo for the situation and mood.
24. Shoot From A Low Angle – (Get a different perspective)
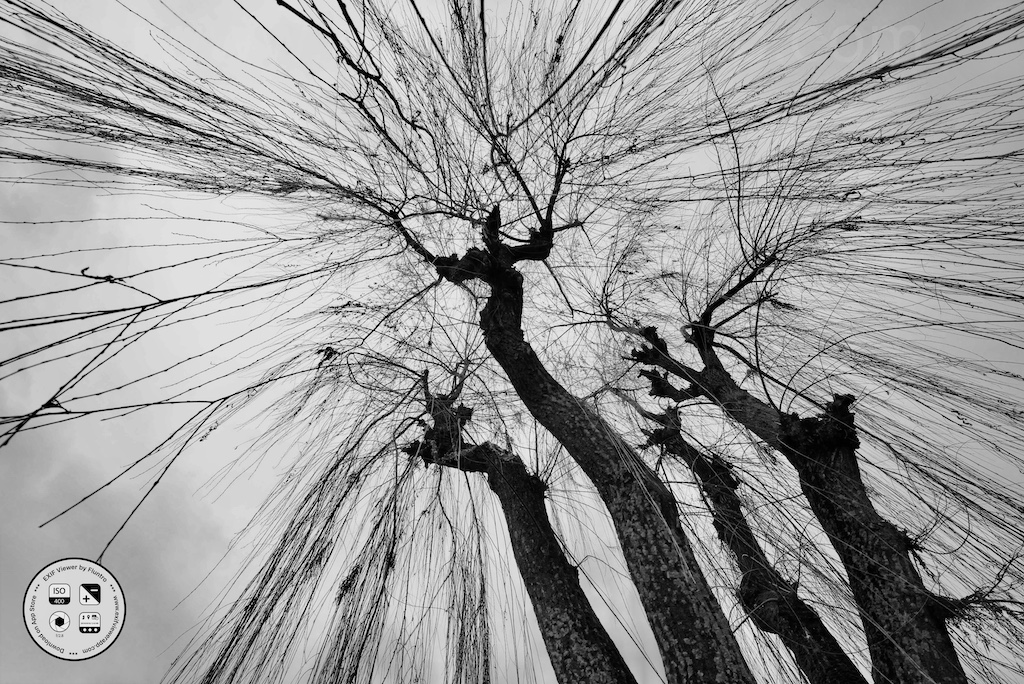
For your photos to stand out among other photos, you must capture something out of the box. Most people shoot photos with their iphone at chest height. Try taking them in a different angle – from below.
25. Try using Shadows in your composition – (Bring mystery to your shots)
Shadows can bring mystery and curiosity to your image. Shadow of the subject is more eye-catching than the subject itself. Use the shadows during morning and evening so that you will get long and interesting shadows.
26. Capture reflections – (Awesome pics)
Shoot reflections- they could become the best head-turner. Especially reflections in water is one to watch.


27. Experiment using Symmetry – (A head-turner technique)
Symmetry has been eye catching since ages. Things are not different in photography. You can easily capture beautifully symmetrical subjects with your iphone. Symmetrical patterns can be found all around us. You just have to look for it. This is another tip that you keep in mind to capture stunning photos using your iphone.


28. The Diagonal Alignment – (Attention-catching depth effect)
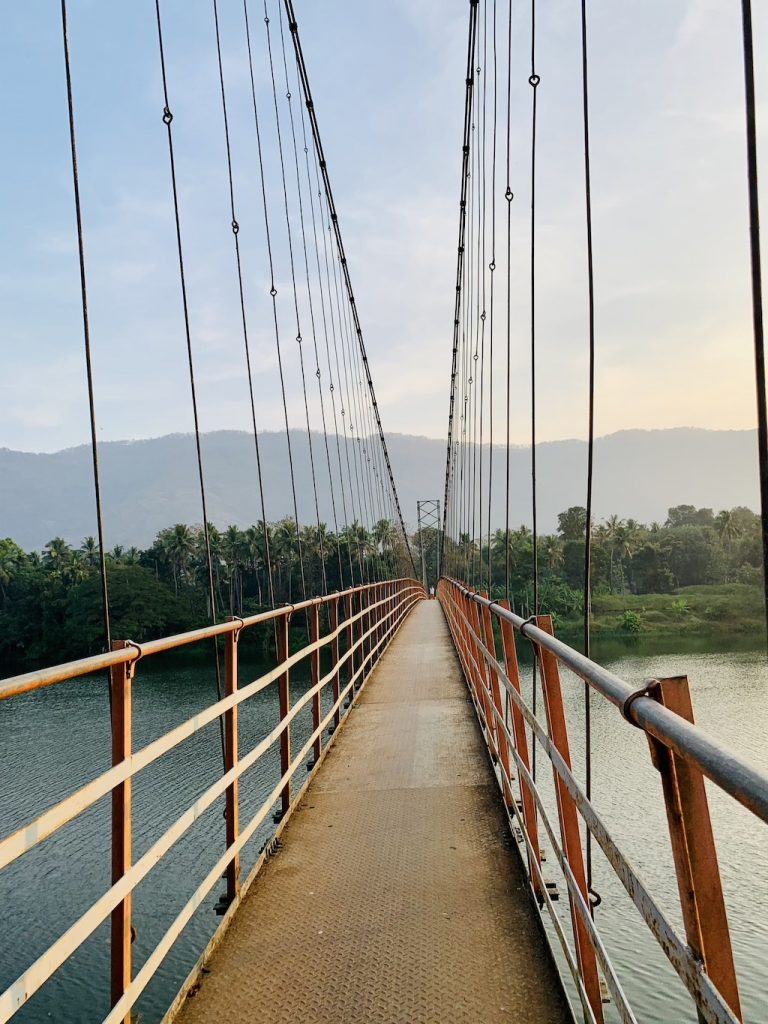
Another way of drawing viewer’s attention to your photo and subject is using the diagonal alignment of the leading lines or the subject itself. This gives you a depth effect in your photo. Check out how these images look.


All these are some outlines or guidelines that can help you capture and edit awesome photos yourself. Photography is all about your perspective. You have your own perspective of viewing things which is what is reflected in your shots. So be confident and go ahead shoot what you feel is awesome.
Happy Shooting.
Also checkout our EXIF Viewer App Photography App
When you take a photo it stores EXIF Metadata like ISO, Shutter Speed, Aperture, location, GPS coordinates, date, altitude, and many more details along with it on your phone. So how can one access all those Exif datas in a single view on your iphone? This App called ‘Exif Viewer by Fluntro’ can display all your photos exif details on your phone. Scroll down to view other details like altitude, speed, date, time, speed, etc. It is the most loved app by professional photographers. So, try to learn a lot about your photos hidden details through this app.
Download:
Appstore link of paid Full version :- https://apps.apple.com/app/exif-viewer-by-fluntro/id944118456
Appstore link of Free Lite version :- https://apps.apple.com/us/app/exif-viewer-lite-by-fluntro/id979066584
Checkout the preview video of Exif Viewer by Fluntro:

